| Previous | 1 | 2 | 3 | 4 | 5 | 6 | 7 | 8 | 9 | 10 | Next |
If you install a trail version of QTP 9.2 then it will run for 14 days after which you need a license from HP to use the QTP 9.2 other wise it would not work.
1. As soon as you install Quick Test Professional 9.2 you can run the application either from the desktop on which a shortcut of the application is created or you can launch QTP 9.2 by going to Start Menu -> Programs -> Quick Test Professional and click on the menu item.
2. The window “Add in Manager” is opened. Since we are learning to use QTP 9.2 un check all the addins and click OK button.

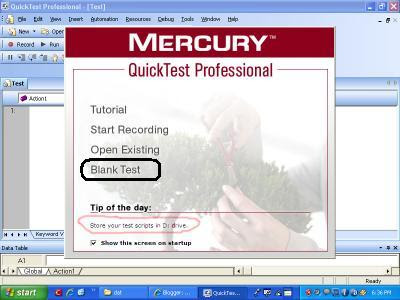
3. As soon as the application is launched click the Blank Test on the window

4. The main QTP window is opened which contains the Expert View, Keyword View, Data Table Window and Active Screen window. Look at the screen below.

Expert View: Expert View is to generate scripts. It is similar to a notepad which is used to generate or write test scripts. This is for expert users.
Keyword View: Keyword View gives the tree structure of the script. This view is for novice users which gives all the description of how the script runs.
Data Table: Data table is used for Data Driven Testing.
Active Screen: Active Screen captures the snapshots of the Application Under Test (AUT) during recording. This is helpful for easy debugging.
5. We will be looking at how to record and play using the Record and play feature in QTP 9.2 but our main focus will be to write scripts rather than recording the scripts.
| Previous | 1 | 2 | 3 | 4 | 5 | 6 | 7 | 8 | 9 | 10 | Next |
0 comments:
Post a Comment